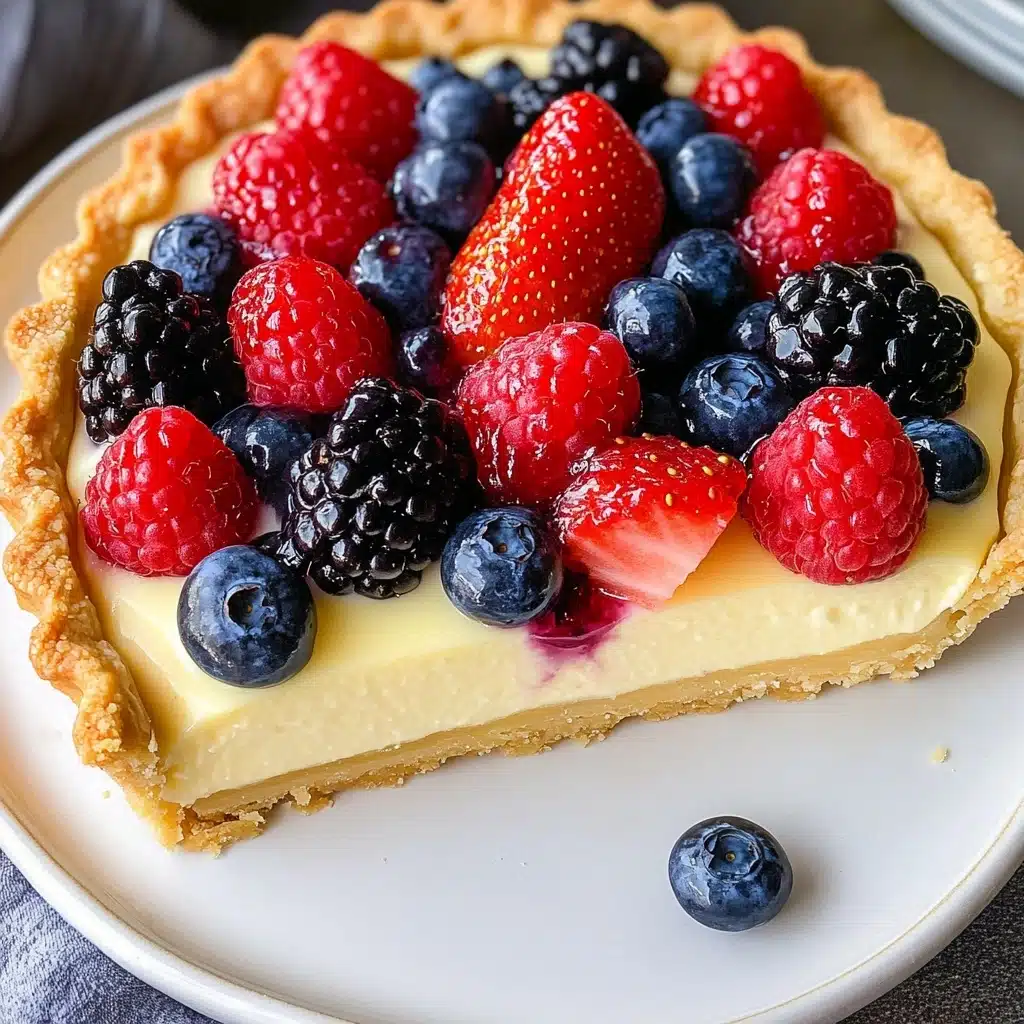
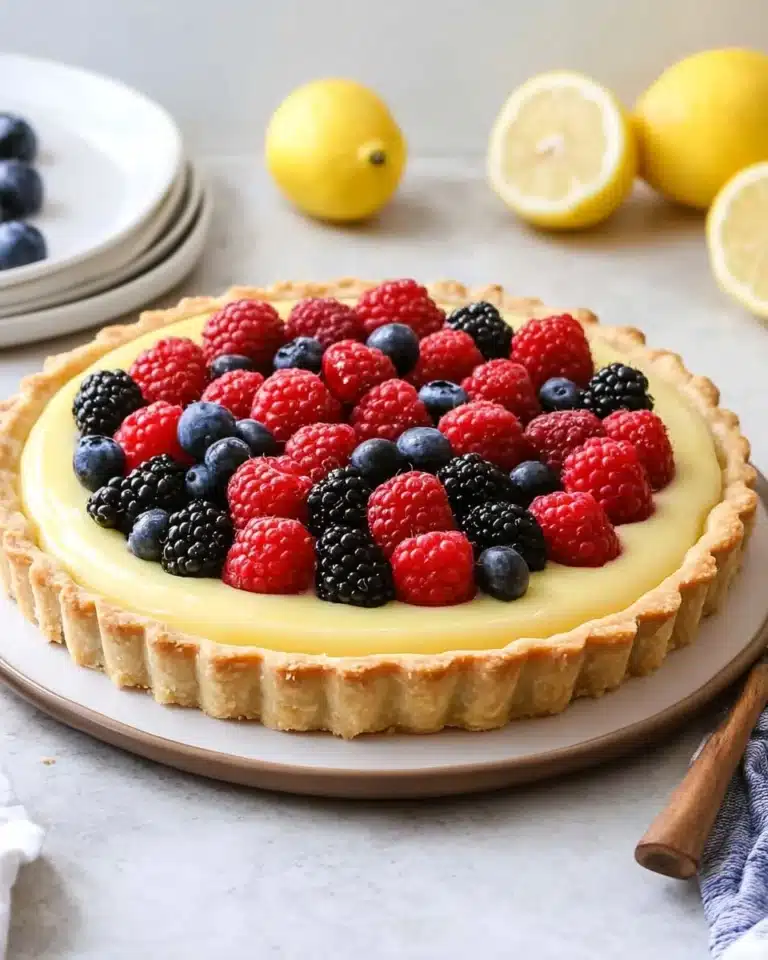
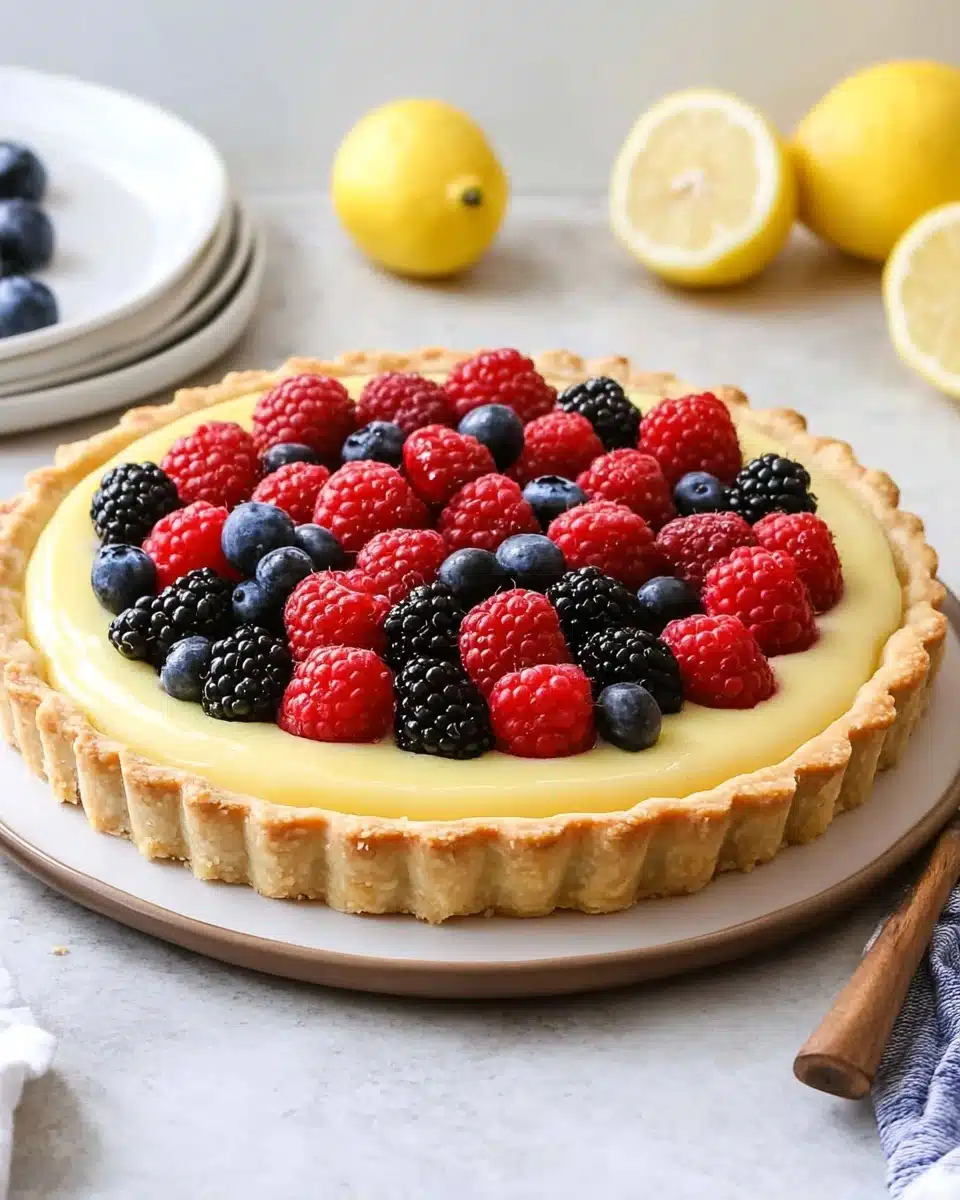
With its buttery crust, luscious lemony filling, and juicy crown of fresh berries, Lemon Berry Tart is truly the definition of summer in a dessert. This gorgeous treat delivers bright citrus flavor and creamy texture with every bite. Whether you make it for a celebration or a cozy afternoon tea, this tart is always a showstopper. The contrast of sweet, tart, creamy, and crisp is pure magic, and the colorful fresh berries make it as beautiful as it is delicious.

Ingredients You’ll Need
Every ingredient in this Lemon Berry Tart is simple and easy to find, but each one has a vital role: from the tender, buttery crust to the tangy, silky filling and the juicy, jewel-toned berries on top. Here’s what you’ll need and why each matters:
- All-purpose flour: The foundation of the crust, providing structure and a light, tender base for the filling and berries.
- Granulated sugar: Adds subtle sweetness to the crust and enhances the creamy filling without overpowering the lemon flavor.
- Salt: Just a pinch heightens all the other flavors and balances sweetness.
- Cold unsalted butter, cubed: Essential for a crisp, flaky tart crust and that irresistible buttery taste.
- Large egg yolk: Brings richness to the crust, helping everything bind together while adding tenderness.
- Ice water: Helps bring the dough together—be sure it’s icy cold for best crust texture!
- Whole milk: Creates a custard that’s creamy and full-bodied, the perfect base for the lemon flavor.
- Large egg yolks (for filling): Gives the lemon filling its indulgent, velvety texture and beautiful golden hue.
- Cornstarch: Thickens the filling just enough so every slice holds together, but melts away on your tongue.
- Lemon zest: Packs in loads of fragrant, natural lemon flavor that sings in every bite.
- Unsalted butter (for filling): Melds into the filling for a glossy, smooth finish and incredible mouthfeel.
- Vanilla extract: Adds just a hint of warmth and sweetness to complement the citrus.
- Fresh lemon juice: The true star—brings zingy brightness that’s essential to this dessert.
- Fresh berries (strawberries, raspberries, blueberries, blackberries): Use a colorful mix! They add fresh sweetness, juiciness, and visual wow-factor atop the tart.
How to Make Lemon Berry Tart
Step 1: Make and Chill the Crust Dough
Start by blending the flour, sugar, and salt together, then working in the cold butter until you have a coarse, sandy texture. Whisk the egg yolk with icy water and stir it in, just until the dough forms large clumps. Don’t worry if it doesn’t fully come together in the bowl—a quick press together on the counter is all it needs. Pat into a disk, wrap in plastic, and chill for an hour; this rest is key for the perfect, flaky tart shell later on.
Step 2: Roll Out and Prepare the Crust
Roll your well-chilled dough out on a lightly floured surface to a 12 to 13-inch circle. Gently nestle it into your greased tart pan, smoothing it up the sides and trimming any overhang. Freeze the shell for 30 minutes, prepping it for baking—this helps the crust set and keeps it from shrinking.
Step 3: Blind Bake the Tart Shell
Line the frozen shell with greased foil or parchment and fill with pie weights, rice, or beans. Bake at 400°F for about 18-20 minutes so the shell sets, then remove the weights and bake another 5-8 minutes until golden and dry. Let it cool completely—the crust needs to be crisp and room temperature before you add the filling.
Step 4: Prepare the Lemon Berry Tart Filling
While the crust cools, warm up your milk just to the point of steaming. Meanwhile, whisk egg yolks, sugar, cornstarch, and lemon zest in a bowl—they’ll be thick! Gradually whisk the hot milk into the egg mixture (slowly, to prevent curdling), then return the mix to the pan. Stir constantly until it thickens, about 3-4 minutes. Off the heat, add butter, lemon juice, and vanilla for a glossy, vibrant custard. Press plastic wrap directly onto the surface and chill until completely cold.
Step 5: Assemble and Decorate the Lemon Berry Tart
When both crust and filling are chilled, stir the custard until smooth and spread it in an even layer inside the crust. Now for the fun part: pile and arrange your fresh berries on top however you like—neat concentric circles, cheerful berries all over, or artistic clusters. Chill the tart until you’re ready to serve, and get ready for compliments!
How to Serve Lemon Berry Tart

Garnishes
Want to take your Lemon Berry Tart even further? Dust with a bit of powdered sugar for a frosted effect, scatter over some grated lemon zest for a fragrant pop, or tuck in a few sprigs of fresh mint for color and a hint of refreshing green. Edible flowers make it almost too pretty to eat!
Side Dishes
This vibrant tart is a star on its own, but it pairs beautifully with a bowl of whipped cream or a scoop of vanilla bean ice cream. For brunch, offer it with fresh fruit salad or a glass of chilled sparkling wine or lemonade—it keeps everything light, bright, and festive.
Creative Ways to Present
If you’re making Lemon Berry Tart for a party, try cutting it into small squares for bite-size treats, or present it on a pedestal cake stand for a grand centerpiece. Arrange the berries in color-blocked sections or create patterns with sliced strawberries and whole blueberries for an extra stunning touch.
Make Ahead and Storage
Storing Leftovers
If you have any tart left (lucky you!), simply cover it tightly and keep it in the refrigerator. Lemon Berry Tart tastes best the day it’s assembled, but it stays delicious and fresh for up to three days—the crust might soften a little, but the flavors stay bright and lovely.
Freezing
While it’s best enjoyed fresh, you can freeze the baked, unfilled tart shell tightly wrapped for up to one month. The lemon filling itself doesn’t freeze as well, so for best results, assemble the tart the day you plan to serve it and keep berries fresh.
Reheating
There’s no need to reheat Lemon Berry Tart—it’s meant to be enjoyed chilled. If you want to crisp up the crust after storing, pop just the empty shell in a hot oven for a few minutes before filling. Once filled and topped with berries, serve straight from the fridge!
FAQs
Can I use bottled lemon juice instead of fresh?
Fresh lemon juice really makes a difference here, giving the filling a vibrant, natural flavor that bottled juice can’t match. If possible, always go with freshly squeezed—it’s worth it!
What kinds of berries work best?
A medley of strawberries, raspberries, blueberries, and blackberries not only looks beautiful but also offers a pleasing blend of tart and sweet flavors. Use what’s ripest and in season for the juiciest results.
How far in advance can I prepare Lemon Berry Tart?
You can prepare each component ahead: the crust and the filling can both be made several days in advance. Assemble the tart and add the berries within two hours of serving for maximum freshness and best texture.
Can I make this without a tart pan?
Yes! If you don’t have a tart pan, a shallow 9-inch pie pan works. The filling layer will be a bit thinner and you might serve it directly from the dish, but the flavor and joy are exactly the same.
What can I do if my custard is lumpy?
Don’t worry—just press the finished custard through a fine-mesh strainer before chilling. This smooths out any lumps and gives you the silkiest, dreamiest Lemon Berry Tart filling possible.
Final Thoughts
If you’re looking for a dessert that’s as irresistible as it is radiant, give this Lemon Berry Tart a try. I promise, each forkful tastes like sunshine and celebrations, and it’s always a joy to share. Happy baking!
Print
Lemon Berry Tart Recipe
This Lemon Berry Tart features a buttery homemade crust filled with velvety lemon custard and topped with an array of fresh berries. It’s a stunning yet simple dessert, perfect for showcasing summer fruit. The tart’s harmonious balance of creamy lemon filling and vibrant berries brings a taste of sunshine to any table, making it an ideal treat for gatherings or special occasions.
- Total Time: 4 hours
- Yield: 8 servings
Ingredients
For the crust:
- 1 ⅓ cup all-purpose flour
- 2 tablespoons granulated sugar (25 grams)
- ¼ teaspoon salt
- ½ cup cold unsalted butter, cubed
- 1 large egg yolk
- 2–3 tablespoons ice water
For the filling:
- 2 cups whole milk
- 5 large egg yolks
- ½ cup granulated sugar
- ¼ cup cornstarch
- Zest of 1 lemon
- ¼ cup unsalted butter, cubed
- ½ teaspoon vanilla extract
- 1 tablespoon fresh lemon juice
For topping:
- 2–3 cups fresh berries (such as strawberries, raspberries, blueberries, and blackberries)
Instructions
- Prepare the Crust Dough: In a large bowl or food processor, combine flour, sugar, and salt. Add cubed butter and cut it in using a pastry blender or pulse until the mixture is coarse and sandy.
- Bring Dough Together: Whisk egg yolk with 2 tablespoons ice water. Add to flour mixture and use a spoon or your hands (or a few pulses) to form large chunks. If needed, add more ice water ½ tablespoon at a time until just combined. Don’t overwork or add too much water; the dough doesn’t have to form a solid ball.
- Chill the Dough: Turn out the dough onto the counter, form into a disk, wrap in plastic, and chill in the fridge for 1 hour (or up to 3 days).
- Roll Out and Line Tart Pan: On a floured surface, roll out dough to a 12-13-inch circle. Transfer to a greased 8-inch tart pan, pressing gently. Trim or fold excess dough. Freeze for 30 minutes. Preheat oven to 400°F while freezing.
- Blind Bake the Crust: Line the crust with greased foil or parchment. Fill with pie weights, dry rice, or beans. Bake for 18-20 minutes. Remove weights and foil, then bake for 5-8 minutes more until dry and lightly golden. Cool completely.
- Prepare the Lemon Custard: In a medium saucepan over medium heat, warm the milk just to the point where bubbles appear at the edges (do not boil).
- Make Egg Mixture: In a bowl, whisk egg yolks with sugar, cornstarch, and lemon zest until very thick. Gradually add warm milk to the egg mixture in a thin stream, whisking constantly.
- Cook the Custard: Return the mixture to the saucepan. Cook over medium heat, stirring constantly with a rubber spatula, until thickened (about 3-4 minutes).
- Finish the Custard: Remove from heat. Stir in butter, lemon juice, and vanilla. Pour into a bowl. Cover with plastic wrap pressed directly on the surface, then chill 1-2 hours until completely cool.
- Assemble the Tart: Once crust and custard are completely cool, stir custard until smooth and spread evenly into the tart shell.
- Add Berries and Serve: Top custard with fresh berries. Serve immediately or refrigerate up to 2 hours. Best enjoyed the day assembled, but keeps in the fridge for a few days.
Notes
- If you have a tart pan with a removable bottom, use it for easy release.
- The crust dough can be made ahead and stored in the fridge for 3 days or frozen for 1 month.
- Baked, unfilled tart shell can be kept at room temperature (covered) for 3 days.
- The filling may be prepared in advance—up to 1 week—and kept refrigerated.
- If you don’t have a tart pan, a shallow 9-inch pie pan works; the filling will be thinner but still delicious.
- For best results, assemble the tart shortly before serving so the crust stays crisp.
- Prep Time: 30 minutes
- Cook Time: 30 minutes
- Category: Desserts
- Method: Baking
- Cuisine: French
- Diet: Vegetarian
Nutrition
- Serving Size: 1 slice (1/8 tart)
- Calories: 400 kcal
- Sugar: 21g
- Sodium: 109mg
- Fat: 23g
- Saturated Fat: 13g
- Unsaturated Fat: 10g
- Trans Fat: 0g
- Carbohydrates: 43g
- Fiber: 2g
- Protein: 7g
- Cholesterol: 198mg

